- Remove both crank arms and plastic motor outer covers, next remove both crank arm cir clips from the crank shaft.
- Remove the 6 x T25 Torx screws from the right-hand motor cover.
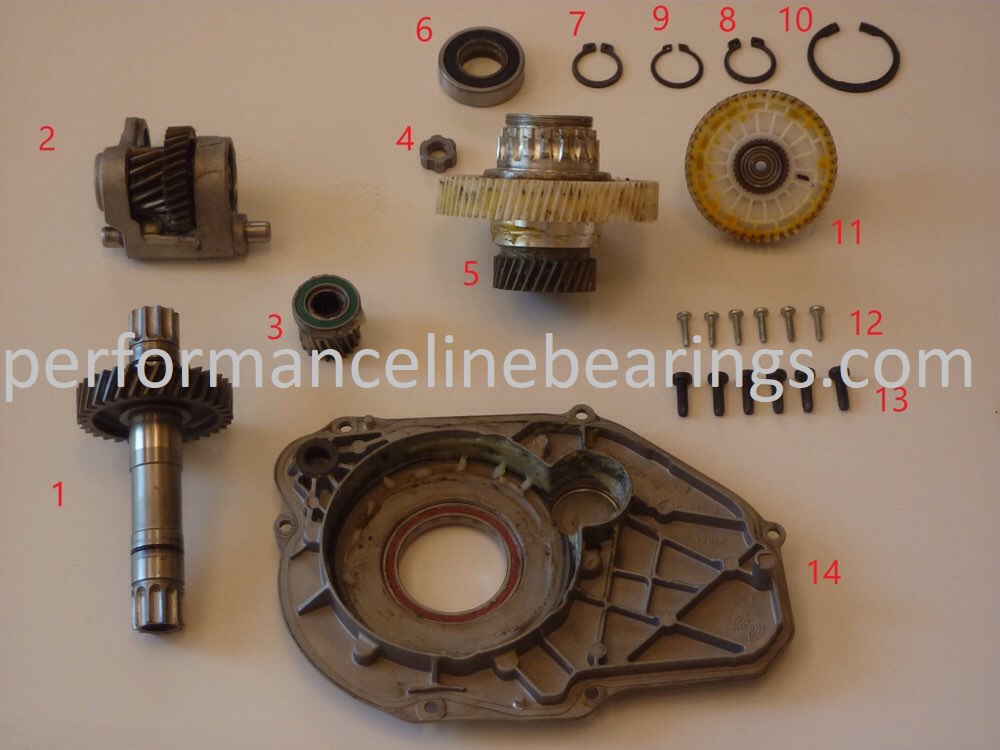
- Gently tap around the outside edge of the motor casing to break the seal. (Don’t worry there is no gasket just a thin re-usable seal bonded to the cover)
- You will probably have to drift the main motor drive gear and clutch bearing assembly out of the motor cover. (Use a soft hammer or lump of wood between your hammer and the drive gear to avoid any damage.)
- Press or knock the main motor bearing from the housing with a hammer and punch or similar.
- Remove the transfer gear (No 11) from its locating pin (if it doesn’t come off during Step 3)
- Remove the wiring plugs from the sockets on the left-hand side of the engine. (This will aid moving the circuit board later on).
- Bosch fit a security nut to hold the torque/movement sensor. This MUST be removed. If you don’t have a specialist tool, you can use a 17mm 6 sided socket or punch to loosen the nut. If damaged it can be replaced by a nice 10 x 1.5mm threaded lock-nut.
- Remove the 6 T15 torx screws from the printed circuit board (PCB) and gently pry it away from the motor by pushing on the plug sockets from the back. (It is stuck by a few blobs of silicone). DON’T pull it away too far!
- Gently move the PCB up and out the way.
- Remove the torque/movement sensor.
- The reduction gears (No2) and the crank shaft gear will all come out together when you knock the crank shaft out of the left-hand crankshaft bearing (use a soft hammer or block of wood to avoid damaging the shaft). Keep an eye on the PCB too!
- You can now access the left-hand crank shaft bearing (No 6) and cir-clip (No 10). Remove this cir-clip and knock the bearing into the motor area from the left-hand side.
- Once the new bearing has been fitted the crank shaft and reduction gears must all go back in as an assembly. Tap the crank shaft into the new bearing and replace the torque/movement sensor.
- When replacing the PCB, take note of the exact wiring route for the torque/movement sensor wires.
- Here I am using a 10 x 1.50mm lock nut which replaces the Bosch security nut.
- It’s up to you but the right-hand crank bearing is only replaceable with specialised equipment and a lot of finger crossing! I tend to pack this bearing with silicone grease (Now the new Bosch tacky grease) on a regular basis to extend its life as far as possible.
- Replace both left and right crank arm cir-clips.
- Use plenty of silicone grease around the main motor bearing, fit or refit the dust seal.
- Refit your sprocket, O-ring and crank arms.
- Job done and we didn’t even remove the motor!